Ambulance Pre-Delivery Inspection Attendees:
- ICU Automotive Representative (Inspector)
- Client (e.g., Head of EMS, Procurement Officer, Chief Mechanic)
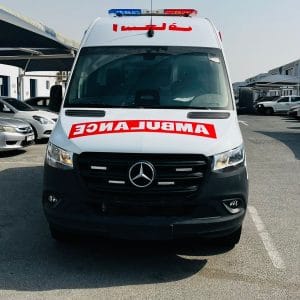
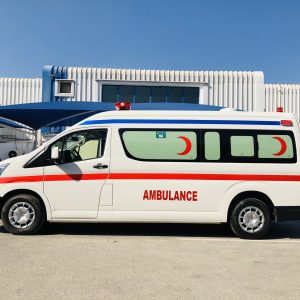
Vehicle: 2025 Mercedes-Benz Sprinter 4×4 Type III Ambulance
Location: ICU Automotive Manufacturing Facility
Objective: To walk the client through a comprehensive inspection of their new ambulance, verifying that all specifications, safety standards, and functional requirements have been met or exceeded, ensuring complete client confidence before signing the acceptance paperwork.
Phase 1: Introduction & Documentation Review (15 minutes)
- Inspector: “Welcome, [Client’s Name]. Thank you for being here today. This is an exciting step, and our goal is to ensure you are completely satisfied with your new vehicle. We’ll be conducting a thorough walk-around, and I encourage you to ask questions at any point.”
- Inspector: “Before we look at the vehicle, let’s review the documentation to ensure everything is in order.”
- Presents the Build Sheet against the original purchase order, line by line.
- Reviews Certificates of Conformity (CEN 1789 standard, chassis compliance, etc.).
- Presents Warranty Packages for both the chassis and the upfit, explaining coverage periods and procedures.
- Provides Maintenance Schedules and Operator Manuals.
- Key Question: “Does the build sheet match exactly what you ordered?”
Phase 2: Exterior Inspection & Chassis (30 minutes)
The inspector leads the client around the vehicle in a systematic clockwise pattern.
1. Chassis and Body:
- Inspector: “Let’s start with the foundation. We’re on a 2025 Mercedes Sprinter 4×4 chassis. You can see the VIN plate here, matching your documentation.”
- Check: Bodywork for any scratches, dents, or misalignments. Panel gaps are even.
- Check: The “double door” seal integrity. The client is encouraged to open and close the rear and side doors to feel the smooth operation and positive latch.
2. Critical Systems:
- Inspector: “Let’s check the critical external systems. Here is the 220V auto-eject external shore power connection. This allows you to power the module without draining the batteries.”
- Check: All exterior lighting is activated via the control panel inside. The inspector walks the client to the front to confirm:
- Low Beam, High Beam, LED Daytime Running Lights.
- Front and Rear Fog Lights.
- Side Warning Lights (Check for visibility at all angles).
- Rear Work Lights (Illuminate the ground behind the ambulance).
- Check: The 4×4 Badging and the all-season tires with correct tread depth and pressure.
3. Safety Equipment:
- Inspector: “Your primary safety equipment is located here.” Points to the 6 kg fire extinguisher in its quick-release bracket.
- Check: The spare wheel carrier mechanism is demonstrated for easy access.
- Check: The wheel chocks and high-visibility triangles are present in their designated storage spots.
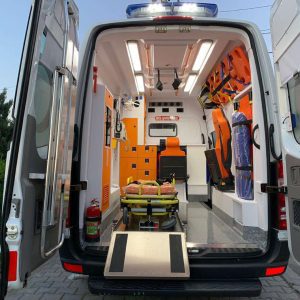
Phase 3: Interior Medical Compartment Inspection (45 minutes)
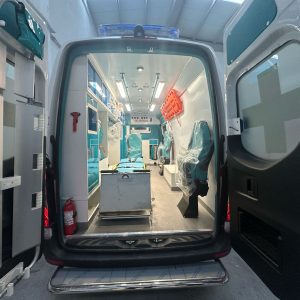
This is the most detailed phase. The inspector opens the rear doors and invites the client inside.
1. First Impressions & Build Quality:
- Inspector: “Step inside. First, please note the materials. All surfaces are non-porous and sealed for easy decontamination. The flooring is a single-piece, antimicrobial material with integrated rails for the stretcher system.”
- Client Action: The client is encouraged to feel the surfaces, check cabinet seams, and inspect the overall finish.
2. Major System Demonstration:
- Electrical System:
- Inspector: “This is the main control panel. From here, you control all interior lights, the HVAC, and the scene lights. Let’s turn on the 8 LED medical lights.” The client confirms the bright, shadow-free illumination.
- Inspector: “Let’s test the stationary climate control. I will now turn off the vehicle’s engine.” The inspector does so. “The system is now running purely on the independent AGM batteries. You’ll feel the air continue without interruption.”
- Check: The client tests several of the 6x 12V and 5x 220V sockets with test lights or equipment.
- Oxygen & Suction System:
- Inspector: “Your oxygen system is designed for redundancy. Here are the secure holders for the 2x 10L and 2x 2L bottles. Let’s open a valve and test the flow from one of the 7 outlets.” A flow meter is used to verify.
- Inspector: “We have two suction systems. This is the electric suction unit.” It is turned on to demonstrate power. “And this is the Venturi suction,” which is activated by connecting it to an oxygen outlet.
- Stretcher & Loading System:
- Inspector: “This is the core of your workflow. This is the electropneumatic 12V load system.” The inspector demonstrates the lowering of the system to the ground and its return to the locked transport position. The smooth operation and lack of strain are highlighted.
- Inspector: “Now, let’s demonstrate the electric stretcher itself.” The Trendelenburg and Reverse Trendelenburg functions are shown. The client is invited to operate the controls.
- Storage & Equipment:
- Inspector: “All your specified equipment is secured and organized. The two emergency kits (respiratory/circulatory) are here, and the pediatric kit is in this drawer. The telescoping IV hooks are in the ceiling, and the three certified crew seats all have their 3-point harnesses.”
- Client Action: The client opens cabinets and drawers, checking that the foam cutouts correctly secure the equipment (e.g., defibrillator, monitor, ventilator).
Phase 4: Cab & Driver Compartment (15 minutes)
The client and inspector move to the cab.
- Inspector: “In the cab, your key safety features include driver and passenger airbags and this communication window to the patient compartment.”
- Demonstration: The inspector demonstrates the key-off run feature: “With the key removed, you can still activate the emergency lights, sirens, and maintain climate control in the module. This is crucial for scene safety and patient comfort.”
- Check: All standard vehicle functions are tested (wipers, signals, horn, 4×4 selector).
Phase 5: Final Verification & Sign-Off (15 minutes)
- Inspector: “We’ve now inspected the vehicle from bumper to bumper. Do you have any final questions or are there any items you’d like me to revisit?”
- Inspector: “Once you are fully satisfied, we will sign the Certificate of Acceptance and the Pre-Delivery Inspection Report together. This formalizes the transfer of ownership and initiates your warranty.”
- Inspector: “Finally, I will provide a hands-on operator training session for your team, covering all the systems we’ve tested today, basic troubleshooting, and daily checks.”
Closing:
- Inspector: “On behalf of ICU Automotive, thank you for your trust. This vehicle was built with one purpose: to help your team save lives safely and effectively. We are proud to deliver it to you and are always here to support you.”